Add Row
Add Element
cropper
update
AI Ranking by AIWebForce.com
cropper
update
Add Element
  • Home
  • Categories
    • Marketing Evolution
    • Future-Ready Business
    • Tech Horizons
    • Growth Mindset
    • 2025 Playbook
    • Wellness Amplified
    • Companies to Watch
    • Getting Started With AI Content Marketing
    • Leading Edge AI
    • Roofing Contractors
    • Making a Difference
    • Chiropractor
    • AIWebForce RSS
  • AI Training & Services
    • Three Strategies for Using AI
    • Get Your Site Featured
May 07.2025
2 Minutes Read

Thriving Monstera Health: Key Signs Your Plant Might Be Sick

Sick Monstera leaf showing signs of yellowing and browning.

Understanding Your Monstera Plant for Better Care

Just like we need the right conditions to thrive, your Monstera deliciosa also requires attention and care. This iconic tropical plant, often found in homes, has heart-shaped leaves that can transform any room with their lush greenery. However, keeping a Monstera healthy can sometimes feel like a daunting task for new plant parents. Recognizing the early signs of distress is essential to ensuring your plant remains vibrant and flourishing.

Key Signs of a Sick Monstera

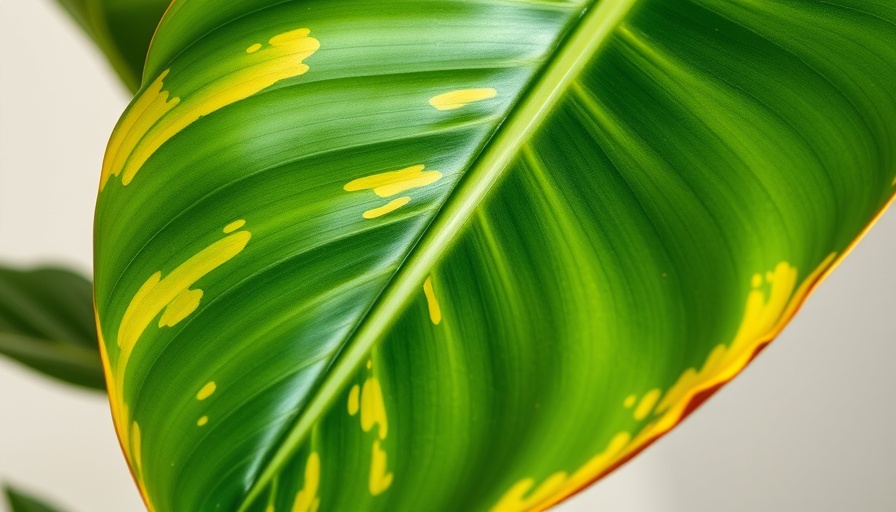
If you're noticing signs that your Monstera isn't performing at its best, it’s time to take action. According to experts, yellowing leaves are often the first indicator that something is amiss.

Megan Brame, a plant expert and podcaster, notes that yellowing or drooping leaves followed by crispy edges signal distress, possibly due to improper light or watering issues. Interestingly, leaf curling and lack of new growth can also point towards unmet needs. It's crucial to examine your plant closely to determine what changes it might need.

Common Misunderstandings About Monstera Care

One prevalent misconception among plant owners is the assumption that all yellowing is a sign of illness. Gail Pabst, horticulturist at the National Garden Bureau, advises enthusiasts to watch for where yellowing occurs. If it’s an older, lower leaf turning yellow, this is usually normal.

A lack of fenestrations—those iconic splits in the leaves—is another area where misunderstanding can arise. Many gardeners expect these features to develop quickly on new growth, but they actually emerge as the plant matures and adjusts to its environment. Patience is key!

Taking Action: Reviving Your Monstera

To help your Monstera regain its health, first assess its current conditions. Is it getting enough light? Too much sunlight can scorch these plants, while too little may lead to drooping and limited leaf growth. Next, consider your watering routine. Over-watering can lead to root rot, while under-watering results in dry, crispy leaves. It's a balancing act—monitor the soil moisture consistently.

Some plant parents swear by the benefits of providing a moss pole, which offers support and encourages climbing, allowing your Monstera to grow naturally and healthily. As it grows, be mindful of its surroundings and be open to relocating it if you notice it's stretching for light.

The Emotional Connection to Plant Care

Taking care of a Monstera is more than just a hobby; it's a nurturing experience that connects you to nature. Caring for living plants can improve mental well-being and foster a sense of purpose. As they thrive, so do we!

Final Thoughts: Why Your Monstera Matters

Embracing the journey of plant ownership, particularly with a Monstera, can lead to incredible moments of joy and accomplishment. Keeping an eye on your plant and understanding its needs will not only enhance its life but also enrich your own. Remember, every leaf is a testament to the love and care you provide.

Home Now and Future

0 Comments

Write A Comment

*
*
Please complete the captcha to submit your comment.
Related Posts All Posts
04.08.2026

Unlock Your DIY Potential: Master Tile Cutting Like a Pro

Update Cutting Tile: A DIY Guide to Tools and Techniques Cutting tile can seem daunting for beginners, but with the right approach and tools, you can master the process for your home improvement projects. Whether you're creating a beautiful backsplash or laying down ceramic tiles, understanding the different tools at your disposal is crucial for achieving clean, precise cuts. In this guide, we'll explore three essential ways to cut tile that every DIYer can master, helping you transform your spaces with flair. 1. Mastering the Manual Snap Cutter The manual snap cutter is the go-to tool for many DIY enthusiasts, especially for beginner projects. It's designed to handle ceramic and porcelain tiles easily, allowing for straight cuts and geometric shapes with finesse. Its ease of use makes it ideal for new DIYers who want to practice their skills without investing in complexities. To get started with a manual snap cutter: - Mark your tile with a square to ensure precision. - Score along the marked line using the cutter. Apply firm pressure, but avoid excessive force that can lead to chipping. - Once scored, place the tile's foot lever slightly below the top of the tile and push down to snap it. This technique emphasizes gentle handling and the importance of consistency in your scoring. 2. Angle Grinder: For Modern Means and Complex Shapes When it comes to making intricate cuts—like curves around plumbing—an angle grinder shines. This powerful tool can achieve clean lines while accommodating various shapes. However, beginners should approach it with caution and wear appropriate safety gear, including goggles and hearing protection. Using an angle grinder involves: - Marking your cut on the tile and securing it on a stable substrate. - Spray the blade and the tile to minimize dust. - Steadily moving the grinder along your cut line at a controlled pace. Avoid rushing; let the tool do the work! Proper technique helps achieve smooth edges, enhancing the tile's finished look. 3. Wet Tile Saw: The Professional’s Touch For larger projects or tougher materials, a wet tile saw is invaluable. It uses a continuous stream of water to cool the blade and control dust while cutting, making it ideal for high-volume jobs. This method's investment is worthwhile for those embarking on extensive tiling endeavors. To use a wet tile saw: - Begin by filling the water reservoir and ensuring proper setup. - Align your tile on the bed of the saw and let the water flow. - Slowly guide the tile through the blade, maintaining a steady hand for accuracy. As noted in DIY resources, making sure the water flows correctly is essential for operational safety. Conclusion: Your Road to Tiling Success Understanding how to cut tiles effectively empowers you to take on various home improvement projects confidently. By mastering these three cutting techniques, you’ll not only create visually appealing finishes but also enjoy the satisfaction of successfully completing your DIY projects. With the right tools and a little practice, you'll find that tile cutting can be both rewarding and straightforward, paving the way for further home renovations. Ready to slice through your next home improvement project? Dive in with these techniques and watch your creativity bring new life to your spaces!

04.08.2026

E15 Gasoline: Will It Save You Money or Damage Your Engine?

Update Understanding E15 Gas: What You Need to Know Starting May 1, many gas stations will begin offering E15 gasoline, a blend of 15% ethanol and 85% gasoline, thanks to a waiver from the Environmental Protection Agency (EPA). This measure is primarily aimed at easing the financial burden on drivers as gasoline prices remain high due to ongoing geopolitical tensions. However, while E15 promises potential savings at the pump, the ramifications for engine health and air quality deserve careful consideration. The Advantage and Disadvantages of E15 Gas According to the EPA, the goal behind introducing E15 more widely is to boost domestic gasoline supply, especially ahead of the bustling summer driving season. Proponents highlight that E15 can reduce oil consumption and produce fewer greenhouse gases. For drivers of certain vehicles, this may offer a cheaper alternative to traditional fuels, allowing for approximately a 10 to 20 cents per gallon reduction. However, critics warn that E15 isn’t suitable for every vehicle. Cars built before 2001, as well as lawn equipment, boats, and motorcycles, are particularly susceptible to damage from the higher ethanol content. This is because ethanol can corrode rubber and plastic components of an engine, leading to performance issues and possible hefty repair bills. Steve Haney, an automotive expert, emphasizes the need for consumers to check their vehicle’s manual before considering the switch to E15. Ethanol’s Impact on Fuel Economy Interestingly, despite its cost-saving potential, E15 does come with a drop in fuel economy, generally around 1-2% less than standard E10 gasoline. To illustrate, if your vehicle typically achieves 27 miles per gallon with E10, expect a decrease to about 26.5 MPG with E15. For fans of fuel efficiency, this decline might quickly counterbalance any price benefits. The Environmental Perspective: Air Quality Concerns One alarming consequence of increased E15 utilization may be heightened summer smog levels. Experts assert that the chemical composition of E15 could worsen air quality, a concern especially pertinent during warmer months when air pollution is already a pressing issue. Thus, while the intent behind the EPA's waiver may be to assist consumers financially, the environmental implications must be factored into the equation as well. Rolling the Dice on Engine Safety When it comes down to it, whether to use E15 gasoline ultimately depends on the type of vehicle you drive. For newer models, generally manufactured post-2000, E15 is likely safe to use and can even optimize fuel efficiency. However, without diligent consumer education surrounding the risks, there’s potential for a significant percentage of drivers to inadvertently damage their engines through improper fuel choices. Future Implications and Consumer Awareness As the EPA continues to push for more widespread use of E15, the automotive industry and consumers alike need to remain vigilant. It’s crucial for owners to stay informed about their vehicle specifications and any changes in fuel regulations to avoid the pitfalls associated with these new fueling options. By prioritizing education and transparency, the impact of E15 can be navigated more carefully. The future of fuel remains uncertain, with a complex interplay of economic, environmental, and health factors at play. As drivers, comparing fuel options and understanding their implications will empower consumers to make informed choices at the pump—potentially saving money without compromising engine integrity or air quality.

04.07.2026

Essential Safety Recall: Land Rover's 500 Vehicles at Risk Due to Faulty Seat Belts

Update Land Rover’s Critical Recall: Ensuring Your Safety If you own a 2026 Land Rover Defender, it's crucial to pay attention to a recent recall affecting almost 500 vehicles. The National Highway Traffic Safety Administration (NHTSA) has raised red flags concerning faulty seat belts that may not function properly during a crash. Specifically, the issue lies with the third-row lower seat belt anchorage bracket, which may have been insufficiently welded, posing a serious safety risk for occupants. The importance of proper seat belt function cannot be overstated; in an accident, a faulty seat belt could lead to severe injuries or even fatalities. What Vehicles Are Affected? The recall specifically targets 2026 models of the Land Rover Defender manufactured between November 3, 2025, and February 20, 2026. If you have a Defender from this period, it’s imperative to confirm your vehicle's status. You can do this by checking your Vehicle Identification Number (VIN) on the NHTSA website or waiting for a notification letter from Land Rover, expected to be mailed by mid-May 2026. What Should You Do? Until you’ve confirmed the safety of your seat belts, refrain from using the third row. It may be tempting to use all available seating, especially during family outings, but safety comes first. Land Rover has stated that they will replace the faulty seat belt brackets free of charge. They are taking immediate steps to rectify the issue, which began with a stop-ship order after discovering the problem at the assembly plant. This swift action indicates the company's commitment to customer safety. Why This Matters While Land Rover vehicles are often associated with rugged adventures and the thrill of off-roading, this recall serves as a reminder that safety should always be prioritized. Even the most capable vehicles can have inherent risks, and consumer awareness is vital. By staying informed and proactive, you can ensure your safety as well as that of your passengers on your next road trip or off-road excursion. Future Outlook for Defender Owners The automotive landscape is continually evolving, especially with advancements in manufacturing technologies. Land Rover's proactive measures to re-evaluate their production quality show an industry commitment to consumer safety. They have indicated that fixes will involve better quality control processes, ensuring that such issues are less likely to arise in future models. As a Defender owner, expect to see safer, more reliable vehicles on the market in the coming years as these improvements take shape. Frequently Asked Questions Q: How do I check if my Defender is affected by the recall?A: You can check your VIN on the NHTSA website or watch for a communication from Land Rover. Q: Will there be any cost for the repairs?A: No, the repairs to replace the third-row lower seat belt anchorage brackets will be free of charge. Life can be unpredictable, and car safety should never be taken lightly. So if you own a 2026 Land Rover Defender, now is the time to act.

Terms of Service

Privacy Policy

Core Modal Title

Sorry, no results found

You Might Find These Articles Interesting

T
Please Check Your Email
We Will Be Following Up Shortly
*
*
*