

cropper
update
AI Ranking by AIWebForce.com
cropper
update
  • Home
  • Categories
    • Marketing Evolution
    • Future-Ready Business
    • Tech Horizons
    • Growth Mindset
    • 2025 Playbook
    • Wellness Amplified
    • Companies to Watch
    • Getting Started With AI Content Marketing
    • Leading Edge AI
    • Roofing Contractors
    • Making a Difference
    • Chiropractor
    • AIWebForce RSS
  • AI Training & Services
    • Three Strategies for Using AI
    • Get Your Site Featured
May 02.2025
3 Minutes Read

Mastering DIY Hypertufa Planters: A Creative Guide for Gardeners

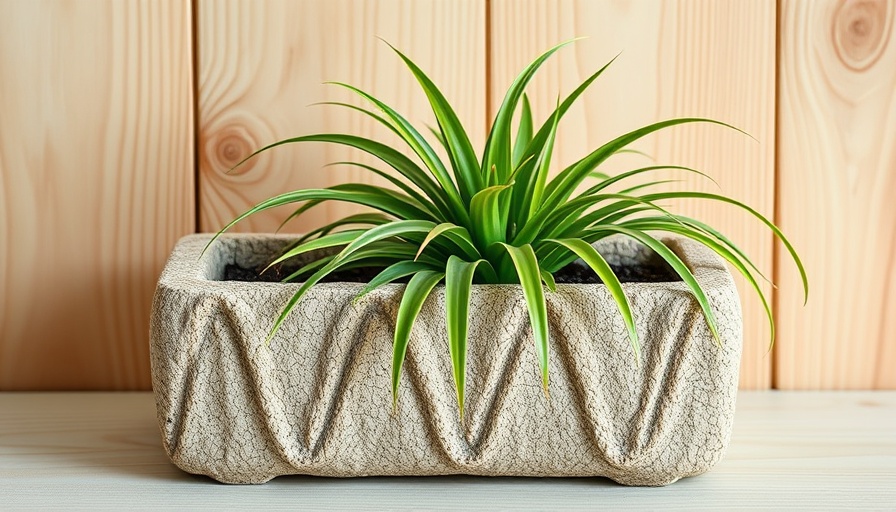
DIY hypertufa planter with green spider plant.

Unleashing Creativity: The Allure of DIY Hypertufa Planters

If you're looking to add a personal touch to your gardening space, crafting DIY hypertufa planters opens up a world of creative possibilities. Hypertufa, a lightweight cement mixture, offers the perfect material for anyone wanting to create beautiful, customized plant containers that can withstand the elements. From the rustic charm of a textured surface to the sleek appearance of a polished finish, the choice of molds and techniques ensures that every gardener can design something uniquely theirs.

What is Hypertufa and Why Choose It?

Hypertufa is a combination of Portland cement, perlite, and peat moss—ingredients that are not only accessible but also environmentally friendly. This mixture results in a planter that weighs less than traditional concrete containers, making them easier to manage and rearrange in your garden. Ideal for outdoor use, these planters thrive regardless of weather conditions, including freezing temperatures.

Step-by-Step Guide: Making Your Own Planters

Follow these crucial steps for a successful hypertufa project:

  1. Select Your Mold: The type of container you use as a mold significantly impacts the final look. For a smooth and glossy finish, opt for a sleek plastic tub. For a more rustic texture, line your mold with plastic and let natural wrinkles guide the design.
  2. Mixing Ingredients: Start by sifting together the dry ingredients: Portland cement, peat moss, and perlite. This ensures an even mix that promotes better hydration.
  3. Add Water Carefully: Slowly incorporate water until the mix reaches the consistency of thick brownie batter. This step is crucial; being too wet can compromise the planters' durability, while adding too little can hinder the mixture’s bonding.
  4. Mold and Cure: Pour your mixture into the mold and allow it to set. Curing is essential; keeping the hypertufa moist for the initial 48 hours helps bond the components effectively.

Benefits of Creating DIY Hypertufa Planters

Beyond being a fun and rewarding project, crafting your own hypertufa planters has several benefits. They are:

  • Cost-Effective: With materials costing only between $10 and $60, creating these planters is far cheaper than purchasing equivalent ceramic or concrete pots.
  • Weather-Resistant: Hypertufa can endure the harshest outdoor conditions without cracking or fading, offering longevity that traditional pots may lack.
  • Personalized Aesthetic: By controlling the molds and the texture, you can create pieces that match your garden's theme or your personal taste perfectly.

Inspiration and Community

Joining a community of fellow gardening enthusiasts can provide you with further inspiration and tips. Many online forums and local gardening groups share their unique hypertufa creations, allowing you to learn from their experiences and even share your progression. The joys of gardening blossom not just through the plants we grow but also in the connections we establish with fellow green thumbs.

By crafting your hypertufa planters, you're engaging more than just in a creative endeavor—you're enhancing your home and embracing a sustainable approach to gardening. Ready to get your hands dirty and design your perfect planter? Gather your materials, follow the steps, and let your imagination lead the way!

Home Now and Future

0 Comments

Write A Comment

*
*
Please complete the captcha to submit your comment.
Related Posts All Posts
06.26.2026

Discover If That Dime in Your Pocket Is Worth a Fortune!

Update Unlocking Hidden Wealth: The Fascinating World of Valuable Dimes Most people carry a few spare dimes in their pockets without giving them a second thought. However, did you know those unassuming coins might be hiding surprising value? From rare mint marks to printing errors, certain dimes can turn an ordinary coin collection into a treasure trove. Join us as we dive into the enthralling world of collectible dimes and why they could be worth much more than their face value. Understanding the Value: What Makes Dimes Rare? The worth of a dime hinges on a few essential factors. According to numismatic expert Ted Ancher from APMEX Inc., these include rarity due to low mintage, survival rates, and collector demand. Some dimes, while produced in high quantities, can be extremely rare today due to historical events like mint closures or legislative orders that led to mass melting of coins. For instance, the legendary 1894-S Barber dime is a prime example of a coin that, despite a limited production run, has fetched over $2 million at auction. A Glimpse into Notable Rare Dimes Among the most sought-after dimes are the remarkable 1916-D Mercury dime, valued for its historic significance and low minting number of just 264,000 coins. Even in worn condition, this dime can command prices between $800 and $1,500. Similarly, the 1942/1 Mercury Dime, known for its distinct overdate error, epitomizes how slight flaws can yield enormous value. The Historical Journey of the Dime Dimes have been part of American commerce since the Coinage Act of 1792, which established the decimal coinage system. The first dimes, featuring a "Draped Bust" design, were struck in 1796 and contained 89.24% silver—a standard that would persist in dimes until 1965. The evolution of dime design reflects significant shifts in American history, from the Seated Liberty to Roosevelt, linking every coin to its era's artistry and economic climate. How to Determine if Your Dimes Are Valuable Correctly assessing a dime's value is a critical skill for any collector. Start by examining the coin’s date and mintmark, followed by checking its physical condition for any defects and signs of wear. Websites listing auction records, and professional grading services can offer insights into your dime's estimated worth. Notably, some valuable dimes are only discernible by professionals, so if you suspect you have a gem, it’s wise to get a professional appraisal. Handling and Care: Preserving Your Dimes' Value As you navigate the world of coin collecting, handling your dimes with care is paramount. Avoid rubbing the coins, as this could significantly damage their surfaces and decrease their value. Instead, invest in archival-quality holders and store them in a controlled environment. This ensures that their condition remains intact, preserving their worth for the long haul. Taking Action: The Path to Becoming a Collector If you’re excited by the possibility of uncovering valuable dimes, your journey starts today. Begin by examining your spare change and learning about the particular features that make dimes valuable. Given the abundance of resources available—from auction results to coin-collecting communities—there’s never been a better time to start your collection. Keep yourself engaged with fellow collectors, broaden your knowledge, and explore local coin shops to find hidden gems!

06.26.2026

Why Electric Grills Are Revolutionizing Healthy Grilling

Update Why Electric Grills Are Winning Hearts and PalatesWith grilling season in full swing, many of us are looking for ways to elevate our outdoor (or indoor) cooking experience. After years of utilizing a traditional propane grill, I recently stepped out of my comfort zone to explore the merits of electric grilling. What started as a reluctant experiment quickly transformed into a significant change in my culinary habits, highlighting numerous benefits that extend beyond mere convenience.Rethinking Grilling TraditionsFor the longest time, I hesitated to swap my gas grill for an electric model, largely influenced by traditional perceptions. It was hard to shake off the notion that using an electric grill somehow diminished the grilling experience. However, my initial skepticism was met with surprising outcomes. Upon testing a modern electric grill, I discovered many advantages that not only simplify the grilling process but also cater to healthier cooking practices.The Health Benefits Are ClearShifting from gas and charcoal grills to electric is not just a culinary upgrade; it also promotes better health. Research suggests that grilling with traditional fuels can lead to harmful carcinogens in food, primarily due to the smoke produced when fat drips onto hot coals or flames. In contrast, electric grills eliminate this problem entirely. They provide a smoke-free environment, reducing exposure to potentially harmful compounds. The National Cancer Institute even highlights how methods that minimize smoke can lower the risks associated with grilling.Clean Air, Cleaner CookingAir quality is a growing concern for many as we become more aware of environmental issues. Electric grills can significantly contribute to cleaner air. Unlike charcoal or propane grills, electric models do not emit harmful gases, which are notorious for aggravating respiratory conditions. The lack of smoke not only benefits our health but also makes electric grilling an excellent option for urban dwellers or anyone living in places where open flames are a no-go.Ease of Use and Clean-UpOne of the standout features of electric grills is the ease of operation. They are designed for simplicity—just plug it in, set your temperature, and grill away! No propane tanks or charcoal mess to contend with. Additionally, cleanup is a breeze. Most electric grills have non-stick surfaces and removable trays, preventing the accumulation of grease and making them easy to maintain. Unlike charcoal or gas grills that often require thorough scrubbing and disposal of ash, an electric grill can be cleaned quickly after each use, promoting a hassle-free grilling experience.A Flavorful ExperienceSome may question whether electric grilling can deliver the cherished flavors we associate with gas and charcoal. From my experience, while there might be subtle differences in taste, electric grilling is not a sacrifice in quality. My partner, initially a skeptic, found that when grilling meat on our electrical model, flavors remained intact, and the texture was beautiful. This adaptability makes electric grills suitable not just for meat but also for vegetables, fish, and even fruits, enabling a diverse range of healthy meal choices.Embracing InnovationThe culinary world is far from stagnant, and electric grills are a testament to innovation in cooking. As grilling technology evolves, features such as built-in timers, temperature controls, and automated shut-offs are becoming standard in electric grills, enhancing not only cooking precision but also safety. As an environmentally conscious consumer, I value these improvements as they reflect a shift towards more sustainable cooking practices.Conclusion: Why Choose Electric Grilling?Switching to electric grilling has profoundly influenced my approach to meals and health. Not only do electric grills provide a path towards cleaner air and healthier cooking, but they also embrace convenience in our busy lifestyles. As we move into a future focused on sustainability and health, electric grills are paving the way for the next generation of cooking. Are you ready to embrace this change?

06.25.2026

The Truth About Taping Windows: Does It Really Work for Hurricanes?

Update The Risks of Taping Windows: A Myth DebunkedAs hurricane season approaches, homeowners often prepare for the worst by following various storm protection methods, one of which is the age-old practice of taping windows. But does this method really work? According to window experts, including Phil Adkins, the popularity of taping windows is grounded more in historical misconceptions than in scientific fact. While it may seem proactive to apply tape in an X pattern across windows, in reality, it can create a sticky mess and foster a false sense of security that detracts from more effective solutions.The Historical Context of Taping WindowsThe practice of taping windows dates back to World War II, when Londoners used tape to minimize injury from bomb blasts. This method was later adopted during hurricane seasons across America as a perceived protective measure. However, modern research indicates that this approach does not change the wind pressure or impact threshold that causes windows to shatter during a storm.Alternatives to Tape: Proven Protection MethodsInstead of relying on tape, there are many more effective options available for protecting your windows during storms. Hurricane-rated windows, for example, are designed to withstand the harshest conditions. Built with a laminated construction similar to car windshields, these windows have been shown to absorb and disperse impact, significantly reducing the risk of shattering.Aside from impact-resistant windows, storm shutters offer a permanent solution. Available in various styles including accordion and roll-down, these provide reliable protection without the hassle of post-storm cleanup. In fact, many homeowners find that investing in modern storm shutters saves them money in the long run by preventing potential damage.Plywood and DIY Solutions: Quick and AffordableIf professional installation or impact windows are not within your budget, consider using plywood as a cost-effective alternative. Although it requires time and effort to install correctly, plywood can be a reliable source of protection when done right. Just be sure to use exterior-grade plywood and secure it tightly.Long-Term Considerations: Costs and BenefitsInvesting in hurricane protection can seem daunting due to the associated costs. However, it’s essential to weigh the long-term benefits of durable solutions against short-term fixes like taping windows. Higher-quality options may come with higher initial costs, but they can also lead to savings through reduced insurance premiums and minimized repair costs after a storm.Actionable Insights for HomeownersFor those living in hurricane-prone areas, understanding these protective measures can save time, stress, and money. Ensure that you evaluate your home’s specific needs and consider investing in professional assessments. Doing so will allow you to select the most appropriate storm protection strategy tailored to your residence.Conclusion: Choose Wisely for Your SafetyAs storms continue to intensify, it’s crucial to adopt methods that genuinely protect your home rather than falling for outdated practices. Taping windows offers no true defense against hurricane forces and can contribute to extensive damage if glass shatters. By focusing on professional-grade solutions, you can ensure the safety of your home and loved ones during the next storm.

Terms of Service

Privacy Policy

Core Modal Title

Sorry, no results found

You Might Find These Articles Interesting

T
Please Check Your Email
We Will Be Following Up Shortly
*
*
*