March 11.2025
3 Minutes Read

Pro Tips for Painting a Ceiling & Transforming Your Space

Man demonstrating how to paint a ceiling with a roller.

Transform Your Ceilings: Simplified Painting Tips

Painting a ceiling can seem like a daunting task, often leading many to shy away from taking on the project themselves. However, with the right approach and techniques, anyone can transform their ceilings into a stunning focal point. The key is not just in the application but also in the preparation, tools, and methods used to ensure a professional finish. Let's explore some pro tips that will make painting your ceiling easier and help you accomplish a beautiful result.

Preparation Is Key: Setting Up for Success

The first step to a successful ceiling painting job is thorough preparation. Before anything else, clear the room as much as possible, moving furniture out of the way or covering it with drop cloths to protect against splatters. A clean workspace sets the foundation for your painting project.

Next, inspect the ceiling for dust or grime that could affect paint adhesion. A quick clean can make all the difference. If there are imperfections like cracks or stains, now is the time to address those with spackle or a stain-blocking primer. According to tips from both Home Depot and The DIY Lighthouse, applying a stain-blocking primer is essential for concealing stubborn stains caused by water damage or smoke.

Choosing the Right Tools and Paint

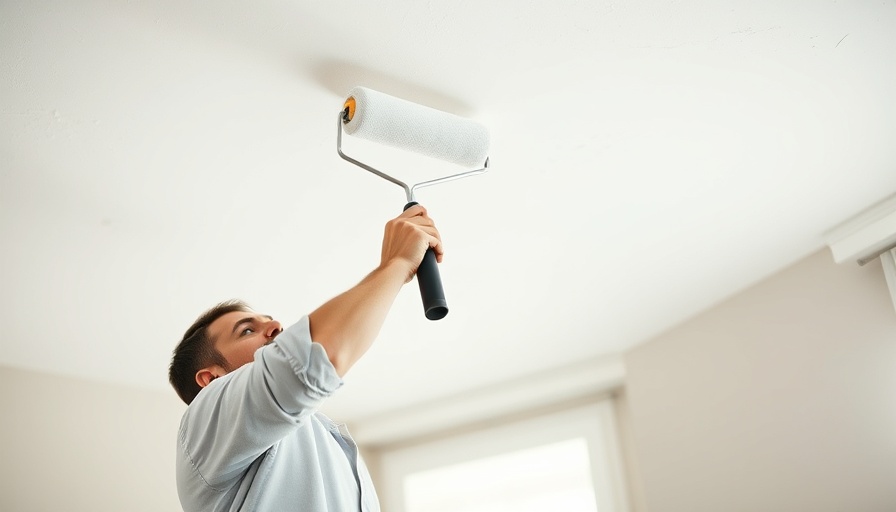
Selecting the correct paint for your ceiling is critical. It’s recommended to use a specialized ceiling paint that has a flat finish to minimize glare. The DIY Lighthouse points out that ceiling paint not only reduces spattering but is also formulated for optimal coverage. A roller with a nap suited for the texture of your ceiling is essential too. For smooth ceilings, a 1/2-inch nap works best, while textured ceilings might require a thicker 3/4-inch nap.

Don't overlook the necessity of a good-quality extension pole for your roller; it can save you from neck strain and allows for easier reach in high places. An angled brush should also be on hand for cutting in around edges and fixtures before rolling the main area.

Techniques for a Flawless Application

Now that you're prepped and ready with the right tools, it's time to paint. Start by “cutting in” at the edges of the ceiling using your angled brush. This method ensures that the roller can cover most of the brush strokes, leading to a more uniform finish.

When rolling on paint, it’s wise to work in small sections of about 5 square feet. This technique keeps your edges wet and helps in avoiding lap marks. Rolling in alternating directions—first in one direction and then at a right angle—enhances coverage and consistency.

Post-Painting: The Finishing Touches

Once the painting is done, allow the ceiling to dry according to the manufacturer’s instructions before applying any necessary second coats. It's likely that uneven patches will need touching up, especially if your ceiling is a lighter color than the original.

Finally, removal of painter’s tape is a satisfying task that reveals the neat lines between your ceiling and walls, highlighting the hard work you've put in.

Why Painting Your Ceiling Matters

A fresh coat of paint on your ceiling not only brightens up the space but also contributes to the overall ambiance of your home. Whether you go for classic white or a bold color, painting your ceiling can drastically change the perception of the room's dimensions and style. It reflects care for your living space, enhancing both its aesthetic and market value.

Embrace the Challenge: Your Ceiling Awaits

Painting your ceiling might have seemed like an overwhelming task, but with preparation, the right tools, and effective methods, it can be an enjoyable DIY project. Don’t hesitate to bring life to those forgotten areas of your home. Happy painting!

Home Now and Future

Write A Comment

*
*
Related Posts All Posts
08.16.2025

The Essential Guide to Deadheading Flowers for a Thriving Garden

Update The Importance of Deadheading: Nurturing Your Garden's Beauty As the growing season progresses, many gardeners find themselves wondering why some plants continue to bloom vibrantly while others start to languish. The secret lies in a practice known as deadheading—a simple yet effective technique that not only enhances the appearance of your garden but also significantly influences plant health. Deadheading is the process of removing spent or wilting flowers from your plants to encourage more blooms, prevent disease, and support overall plant vitality. How Deadheading Works When flowers fade, their energy often shifts toward seed production and decay. By removing these spent blooms, you prompt your plants to redirect their energy towards new growth and additional flowering. Most gardeners notice that plants like petunias and marigolds respond exceptionally well to consistent deadheading, often blooming longer and more profusely into the fall. Practical Tips for Effective Deadheading While deadheading may seem straightforward, a few best practices can ensure you do it effectively. Start with clean gardening tools to avoid introducing pathogens to susceptible plants. Washing your hands before working with your plants is also essential, as oils and residues can impede their health. Identify which flowers need deadheading by looking for wilting or shriveled blooms; you can usually remove them as soon as they start to fade. However, be gentle—removing too many blooms at once can shock your plants. Spread your deadheading tasks over several days, ensuring your plants are healthy and hydrated, ideally having watered them the day before. Choosing Which Plants to Deadhead While many flowering plants benefit from deadheading, some may not. Understanding the specific needs of your plants is crucial to maximizing their growth potential. Perennials like daisies, for instance, thrive when deadheaded, while others may struggle with excessive cutting. Research your plants to discover the best approach for their unique needs. Engaging with Gardening: The Therapeutic Benefits Engaging in garden maintenance tasks like deadheading can offer more than just aesthetic benefits. Many gardeners find solace and therapeutic value in the act of tending to their plants, reporting that it can reduce stress and promote a sense of well-being. Whether you have a green thumb or are just starting, deadheading provides a wonderful opportunity for quiet reflection and connection with nature. Future-Proofing Your Garden: Sustainable Practices With the rising focus on sustainability, incorporating smart gardening practices like deadheading can lead to a healthier environment. By keeping your flowers blooming longer, you're not only enhancing your garden's beauty but also contributing positively to local ecosystems. Pollinators benefit from consistent blooms, creating a well-maintained habitat that supports biodiversity. In Conclusion: Embrace Deadheading for a Flourishing Garden Deadheading may seem like a small task, but its impact on your garden can be profound. By understanding its benefits, implementing practical techniques, and embracing the therapeutic nature of gardening, you set the stage for a vibrant and flourishing outdoor space. So grab your gloves and shears, and get started on the path to a more beautiful garden today!

08.16.2025

Can You Quiz Yourself on These Obscure Car Facts and Win?

Update Test Your Knowledge with Fun Car Facts! If you consider yourself a true car enthusiast, it’s time to shift gears and put your automotive knowledge to the test with some obscure car facts! From quirky car trivia to unique features you may not know about, there’s a whole world of information out there ready to be discovered. This quiz doesn’t just challenge your knowledge but also encourages you to appreciate the intricate workings of the machines that move us every day. Why Obscure Car Facts Matter Understanding the nuances of automobiles is essential for both new drivers and seasoned pros. These little-known facts not only add spice to countless conversations at car shows or family gatherings, but they also deepen our appreciation for the technology and history behind vehicles. Moreover, they can make us better, more informed drivers. Next time you see an odd dashboard symbol, your newfound knowledge might save you from unnecessary confusion or anxiety! Engaging Stories Behind Car Innovations Let’s take a moment to appreciate some fascinating stories behind popular car innovations. Did you know that the first car radio was introduced in 1922, and it was initially ridiculed? Over the decades, technology has transformed vehicles into entertainment centers on wheels. Features like GPS systems and Bluetooth were once seen as luxuries, but now they are essentials in modern transportation. Exploring the evolution of these features invites us to consider how far we've come—and where we're headed in the future. Common Car Misconceptions With every curveball that cars can throw our way, it’s easy to fall victim to car myths. For instance, many believe that adding premium fuel improves the performance of all cars. The truth is that only vehicles designed for higher octane fuel benefit from it. Understanding these myths not only helps us save money but also improves our knowledge as drivers. Cultivating a well-informed perspective equips us to engage in discussions about car maintenance and purchases confidently. A Look at Future Automotive Trends As we peer into the future of automobiles, it’s exciting to consider how technology will continue to evolve. Electric and autonomous vehicles are at the forefront of automotive innovation. In fact, experts predict that by 2025, more than half of new cars sold will be electric. This shift isn't just about being eco-friendly; it’s about redefining how we think about travel. Trends in sustainability will only grow stronger, further influencing automotive design and consumer behavior in the years to come. So whether you find yourself at your local car show or are simply driving down the road, remember that each car has its own story waiting to be told. Stay curious, keep learning, and don’t hesitate to share your knowledge with others!

08.15.2025

Stay Cool with Essential Cooling Gear for Summer DIY Projects

Update Beat the Summer Heat: Essential Gear for Your DIY Projects As temperatures soar, it can be a challenge to stay focused and productive while tackling summer DIY projects. Construction professionals from the hottest corners of the globe, like Arizona and Australia, share their expert advice on cooling gear that can make working under the sun bearable. Acknowledging OSHA's alarming report that thousands fall victim to heat-related illnesses each year, it’s crucial that DIY enthusiasts prioritize protective gear while still getting the job done. Long-Sleeved Shirts: A Surprising Ally When many think of hot weather, the instinct might be to wear short sleeves or go bare. However, according to experts like Australian tradesman Lachlan Buchan, a lightweight, long-sleeved shirt can provide essential protection from harmful UV rays. Buchan suggests selecting breathable materials, noting that while cotton is a favorite, it holds sweat excessively. A better option is lightweight polyester blends, which actively wick away moisture and dry quickly. Comfort Meets Protection: The Right Pants Keeping your skin protected from the sun is paramount, and long pants do just that. Buchan also advises wearing breathable synthetic fabrics like nylon instead of heavy cotton, especially when working in severe heat. Loose-fitting pants allow for air circulation while also safeguarding you from sunburn and potential injuries, offering a balance of comfort and protection. Stay Hydrated: The Importance of Water Hydration is key when working in extreme conditions. Buchan emphasizes the need for accessible water by recommending hydration packs. He shares a tip: freeze water in bottles overnight, then wrap them in cloth for a cool sip throughout the day. This simple strategy can be a lifeline against heatstroke, ensuring that you stay cool and energized. Creating Shade: A DIY Essential With prolonged exposure to the sun, even the best gear can fall short without shade. Buchan suggests using makeshift solutions, like parking your vehicle strategically to provide cover or investing in an affordable beach umbrella. Creating a shaded area can reduce temperatures significantly, making a noticeable difference in comfort and tool usability. Choosing the Right Footwear Finally, don’t overlook the impact of footwear. Instead of traditional heavy leather boots, consider breathable mesh steel-toe shoes. According to remodeler Danny Niemela, investing in these types of shoes not only helps keep feet cool but also ensures safety without sacrificing comfort. Staying cool in extreme conditions is not just about comfort; it’s vital for safety. By incorporating breathable clothing and ensuring proper hydration, DIY enthusiasts can pursue their projects without the detrimental effects of heat exhaustion. Together, these essentials create a more enjoyable and productive working environment in the summer heat.

Terms of Service

Privacy Policy

Core Modal Title

Sorry, no results found

You Might Find These Articles Interesting

T
Please Check Your Email
We Will Be Following Up Shortly
*
*
*