March 20.2025
3 Minutes Read

Transform Your Space: How to Paint a Popcorn Ceiling Like a Pro

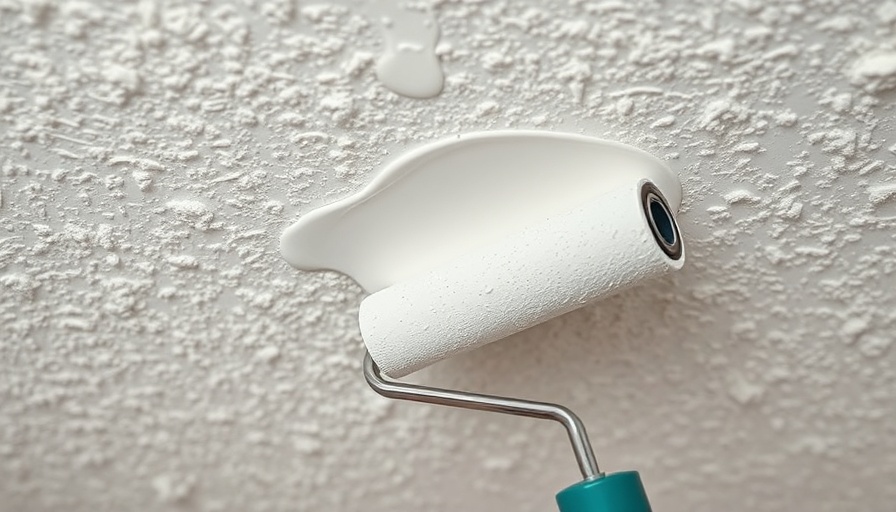
How to Paint a Popcorn Ceiling with a roller brush close-up.

Unveiling the Charm of Popcorn Ceilings

For many homeowners, popcorn ceilings evoke a sense of nostalgia, reminiscent of the design trends of the 70s and 80s. While smooth ceilings have become the go-to for modern interior decor, popcorn textures still hold their own charm. However, as these surfaces are notorious for accumulating dust and dirt, many are faced with the dilemma of whether to refresh or completely remove them. In this guide, we delve into painting popcorn ceilings, a task that requires preparation and methodical execution.

The Safety First Approach: Asbestos Awareness

One crucial aspect to consider before undertaking this DIY project is the potential presence of asbestos in older popcorn ceilings. Asbestos is a serious health hazard, and homes built before the late 1980s are more likely to have this material. If you're unsure whether your ceiling contains asbestos, consider sending a sample for testing as recommended by local home improvement centers. Should testing be outside your budget, always err on the side of caution by wearing protective gear. If left undisturbed, painting over a popcorn ceiling is typically safe; however, proper safety measures are of utmost importance.

Essential Tools and Materials for a Flawless Finish

To achieve the professional look you're after, having the right tools and materials is key. Prepare your toolkit with the following essentials:

  • Angled paintbrush
  • Thick nap roller
  • Drop cloths or plastic tarps
  • Painter's tape for clean edges
  • Ceiling paint and primer to ensure adherence

By selecting high-quality materials, you're setting the stage for a smoother painting process and a beautifully finished ceiling.

Step-by-Step Instructions for Painting

Here, we detail a practical step-by-step approach to painting your popcorn ceiling, ensuring minimal mess and maximum impact:

  • Step 1: Preparation - Begin by thoroughly cleaning the ceiling to remove dust and particulate matter. Use a gentle cleaner that won't damage the texture.
  • Step 2: Masking - Apply painter's tape around the perimeter where the ceiling meets the walls. This prevents any unwanted paint spills on your walls.
  • Step 3: Protect Your Space - Lay down drop cloths to shield your floors and furniture from paint splatter. It's wise to dress in old clothing for added protection against any paint mishaps.
  • Step 4: Priming the Ceiling - If your ceiling has not been painted recently or you notice stains, apply a primer first. This creates an ideal surface for the paint.
  • Step 5: Painting the Ceiling - Use a thick nap roller to apply the ceiling paint. This allows you to cover the textured surface efficiently, ensuring even distribution without missing any crevices.
  • Step 6: Final Touches - After the paint dries, remove the painter's tape carefully. This brings a sharp and clean finish to your work.

Why Investing Time in Home Improvement Matters

Beyond aesthetic appeal, updates like painting a popcorn ceiling contribute to the overall well-being of a home. Freshly painted ceilings can brighten an entire room and evoke feelings of both comfort and pride in one’s living space. Engaging in these DIY tasks not only enhances the home environment but also fosters a sense of accomplishment.

Final Thoughts: Refreshing Your Home

Embracing projects like painting your popcorn ceiling is a proactive step toward making your home reflect your style and preferences. Whether you plan to stay in your home for years or intend to sell it, maintaining its appearance boosts its value and livability. Dive into your next DIY project with enthusiasm, and relish the transformation your efforts create!

Home Now and Future

5 Views

0 Comments

Write A Comment

*
*
Related Posts All Posts
07.01.2025

Anker Power Bank Recall: What You Need to Know to Stay Safe

Update Understanding the Anker Power Bank Recall Your Anker power bank could pose a significant fire hazard. Recent revelations from Anker have led to an extensive recall affecting over one million units of their portable chargers. This recall is not just a precaution; it's a call to action for consumers who depend on these devices for their daily mobile technology needs. As we dive deeper into the reasons behind this troubling recall, it's essential to comprehend the implications and necessary steps for affected shoppers. Responsible technology use is paramount, especially as we lean more on gadgets that keep our devices charged. What’s Behind the Recall? The recall was initiated after Anker discovered potentially hazardous defects in the lithium-ion batteries of certain power bank models. In a statement, the company explained they have enhanced quality assurance measures to identify such issues before they lead to larger problems. They are taking these warnings seriously, indicating that the lithium-ion batteries involved require different handling compared to standard batteries. This contrasts with earlier recalls, which only targeted specific models, showcasing the breadth of the issue. A Closer Look at the Models Affected Among the power banks included in this latest recall are several popular models: Anker Power Bank (10K, 22.5W) — Model A1257 Anker Power Bank (20,000mAh, 22.5W, Built-In USB-C Cable) — Model A1647 Anker MagGo Power Bank (10,000mAh, 7.5W) — Model A1652 Anker Zolo Power Bank (20K, 30W, Built-In USB-C and Lightning Cable) — Model A1681 Anker Zolo Power Bank (20K, 30W, Built-In USB-C Cable) — Model A1689 If you own any of these models, Anker advises you to stop using them immediately. However, do not dispose of them just yet. The company will provide guidance on how to properly return the defective units. Next Steps for Consumers What should you do if you're affected? Anker has created an easy-to-follow Product Recall Submission Form that allows you to either receive a replacement or choose a gift card. It is crucial to confirm that your model is listed before proceeding. Once you've registered for the recall, follow their designated disposal procedures to safely dispose of the affected device at a certified recycling facility. Notably, typical recycling centers may not handle recalled lithium-ion products, making it essential to research ahead of time which facilities do. This ensures both safety and compliance with local disposal regulations. Why This Matters In a world where we are increasingly reliant on mobile devices and gadgets, this recall emphasizes the responsibility manufacturers hold regarding the safety of their products. The evolution of technology means that consumers have higher expectations for quality and safety. While Anker's response shows a commitment to resolving these issues transparently, it also serves as a reminder for consumers to remain vigilant about the products they use daily. By following the guidelines set forth in this recall, you can ensure your safety and contribute to a culture of accountability in tech manufacturing. As technology continues to shape our lives, stay informed and proactive about how you interact with these essential tools.

07.01.2025

Gnats in Your Home: How to Eliminate Them and Prevent Future Infestations

Update Understanding Gnats: The Tiny Troubles Gnats are much more than just pesky nuisances; these tiny flying insects represent a variety of species commonly swarming around damp or decaying organic matter. When encountering gnats at home, it helps to first identify their type. Fungus gnats thrive in the moist soil of your potted plants, while fruit flies are drawn to overripe fruits, and drain flies are notorious for infesting your clogged sinks. Recognizing the specific type of gnat can steer your strategy for elimination and prevention. What Attracts Gnats to Your Home? Gnats are naturally attracted to areas that offer the right breeding conditions—cool, sludgy, moist environments ripe with organic material. This means overwatered houseplants, fruit left out on the counter, and dirty drains are potential breeding grounds. If you're gardening or bringing fresh produce into your home, it’s crucial to remain vigilant to prevent an infestation. Effective Strategies for Eliminating Gnats Fortunately, you don’t have to suffer from a gnat invasion. The first step in eliminating gnats is to rid your home of the sources that attract them. Here are some practical steps: Reduce Overwatering: Ensure that you are watering your houseplants adequately but not excessively. Allowing the soil to dry out between watering can drastically reduce the number of fungus gnats. Clear Out Rotting Fruits: Keep your kitchen tidy by promptly disposing of overripe fruits and regularly wiping down surfaces to eliminate potential breeding sites for fruit flies. Unclog Your Drains: Regular maintenance of your kitchen and bathroom drains can prevent clogged waste that can house drain flies. Use a mixture of baking soda and vinegar followed by boiling water to clear any built-up gunk. Prevention: The Key to a Gnat-Free Home After successfully ridding your home of gnats, maintaining preventative measures is vital to avoid future infestations. Here are some tips that can help you stay gnat-free: Regular Cleaning: Maintain a routine of cleaning your kitchen surfaces, garbage bins, and compost areas or bins regularly to preempt any potential gnat breeding grounds. Monitor Plant Health: Regularly check the moisture level in your plants, and consider utilizing yellow sticky traps that attract gnats if necessary. Seal Entry Points: Ensure that windows and doors are adequately sealed to prevent outdoor gnats from entering your home, particularly during warmer months. Conclusion: Regaining Control Over Your Space Gnats might be tiny, but their presence can have a significant impact on your comfort at home. By understanding their habits and implementing a consistent cleaning and maintenance routine, you can reclaim your space. Remember, it's easier to prevent an infestation than to tackle one once it begins. Keep an eye on your indoor environment and act quickly if you start to see (or hear) those tiny clouds of annoyance!

07.01.2025

Discover How to Use a ScrubDaddy to Its Full Potential Today!

Update Maximizing the Potential of Your ScrubDaddy: The Ultimate Kitchen Companion The ScrubDaddy sponge has taken the cleaning world by storm, and for good reason. Designed to adapt based on water temperature, this fascinating kitchen tool offers an innovative solution that combines functionality with efficiency. But are you using it to its full potential? If you're struggling with a mountain of messy dishes, it's time to re-evaluate how you approach your cleaning tasks. The Science Behind ScrubDaddy's Versatility What makes the ScrubDaddy so unique? The sponge is crafted from a proprietary material known as FlexTexture®, a highly engineered polymer foam that shifts from firm in cold water to soft in warm water. This characteristic means that one sponge can handle a variety of scrubbing needs—from tough, sticky remnants to delicate surfaces that demand a gentler touch. Instead of cluttering your kitchen with multiple sponges for different surfaces, you can simplify your cleaning routine with just one versatile tool. Safe Surfaces: A Housecleaning Wonder Tool ScrubDaddy’s claims regarding safety on various surfaces are impressive. According to their product specifications, this sponge is scratch-free on more than a dozen types of materials, including acrylic, glass, ceramic, and even non-stick coatings. This versatility not only eases cleaning anxiety but also saves you money and space—no need to buy specialty sponges for each surface in your kitchen! Furthermore, ScrubDaddy stands out because it is non-toxic, BPA and latex-free, and resists odors for up to eight weeks. This ensures your home remains free from harmful chemicals while maintaining a fresh and clean atmosphere. Cleaning with Intent: Practical Tips for Household Use So how can you effectively use your ScrubDaddy? Start by designating different sponges for various tasks. For instance, one sponge can be for cleaning dishes, another for scrubbing countertops, and yet another for floors. This will help maintain hygiene and avoid cross-contamination between food prep areas and surfaces that can harbor dirt. Additionally, remember to exploit the cooldown feature: switch to cold water when tackling tough, stuck-on grime, and warm water when you need a gentler clean. This simple adjustment can drastically enhance your cleaning experience. Embracing Sustainable Cleaning Practices Using a product like ScrubDaddy aligns perfectly with contemporary sustainable living trends. In a world increasingly becoming aware of environmental impact, opting for a sponge that minimizes excess waste while maximizing cleaning capabilities is a step in the right direction. Not only are you choosing a long-lasting tool, but you're also promoting a healthier lifestyle within your home environment. Final Thoughts on the ScrubDaddy Revolution In conclusion, the ScrubDaddy sponge is not just another cleaning tool; it’s a game changer for your kitchen cleaning routine. By leveraging its unique properties and versatile applications, you can create a more efficient, organized, and sustainable approach to home maintenance. Whether you're scrubbing pots, counters, or floors, this sponge has the potential to become your favorite household companion.

Add Row
Add Element
cropper
update
New Wave Rocket
cropper
update

Ideas, Insights and Leading Edge Comapnies for 2025.

  • update
  • update
  • update
  • update
  • update
  • update
  • update
Add Element

Electric Store Front

  • Home
  • Categories
    • Tech Horizons
    • Marketing Evolution
    • Energy Alignment
    • Growth Mindset
    • 2025 Playbook
    • Future-Ready Business
    • Wellness Amplified:
    • Home Advantage
    • Home Now and Future
    • Companies to Watch
    • Emerging Trends
  • Getting Started With AI Content Marketing
Add Element

610 740 4605

City, State

7417 Donna Drive #1

New Tripoli, PA 18066
[610] 740-4605
Add Element

ABOUT US

Ideas, insights and inspiration to act in the new web for 2025 and beyond.

Add Element

© 2025 CompanyName All Rights Reserved. Address . Contact Us . Terms of Service . Privacy Policy

Terms of Service

Privacy Policy

Core Modal Title

Sorry, no results found

You Might Find These Articles Interesting

T
Please Check Your Email
We Will Be Following Up Shortly
*
*
*