Add Row
Add Element
cropper
update
AI Ranking by AIWebForce.com
cropper
update
Add Element
  • Home
  • Categories
    • Marketing Evolution
    • Future-Ready Business
    • Tech Horizons
    • Growth Mindset
    • 2025 Playbook
    • Wellness Amplified
    • Companies to Watch
    • Getting Started With AI Content Marketing
    • Leading Edge AI
    • Roofing Contractors
    • Making a Difference
    • Chiropractor
    • AIWebForce RSS
  • AI Training & Services
    • Three Strategies for Using AI
    • Get Your Site Featured
October 24.2025
3 Minutes Read

Discover How to Make Custom Beer Tap Handles for Your Home Bar

Crafting custom beer tap handles, precise woodworking.

Crafting Unique Beer Tap Handles: A Personal Touch for Your Home Bar

Imagine this: a sunny afternoon, friends gathered around your outdoor bar, enjoying freshly poured beer. What stands out is not just the brew but the beautiful, custom-made tap handles that reflect your personality and creativity. Crafting your own beer tap handles can be a fulfilling project that not only adds character to your kegerator but also becomes a conversation starter. It's an opportunity to connect your woodworking skills with your love for brew, resulting in a unique product that showcases your style.

Materials and Tools You Need

Starting from scratch might seem daunting, but the process of making custom beer tap handles is surprisingly straightforward. With a budget of just $10 to $30 and an afternoon’s worth of time, you can create something truly special. All you need is a wood blank, a lathe, and some basic tools. A sturdy corner of your garage can be transformed into a workshop with just a few essentials—think calipers, a mallet, and various types of woodturning tools like skew chisels and gouges. The beauty lies in the material; select a wood type that speaks to you—cherry or walnut can provide stunning finish and durability.

Step-by-Step Guide to Crafting Your Tap Handle

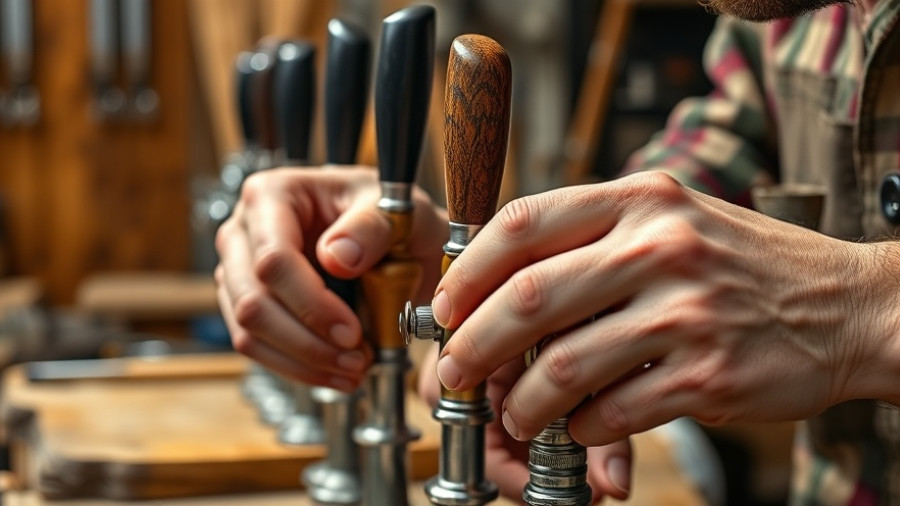
When you are ready to start your project, always remember that the balance of the wood blank is crucial. Begin by finding the center of your wooden blank. This sets the stage for smooth turning on the lathe, which is essential when shaping the handle's profile. As you gradually refine the shape, consider incorporating beads and coves—these small design elements elevate your tap handle from ordinary to extraordinary.

Drilling the hole for the threaded insert is another critical step; ensure it's just the right size to facilitate smooth attachment to your faucet. One of the most enjoyable aspects of this process is personalizing your handle through finishes or carvings. Between sanding and polishing, you might discover methods that truly highlight the wood’s natural beauty.

The Artistry of Wood Turning

Woodturning allows for creativity without the constraints of precision, as the wood often dictates its final shape. Each turn of the lathe reveals a unique character, which makes every handle you create genuinely one-of-a-kind. Dive into your design, think about your favorite commercial tap handles, and replicate aspects you admire while adding your unique flair. This artistry not only enhances your woodworking skills but also brings a sense of accomplishment as you stand behind your bar.

Benefits of Custom Beer Tap Handles

Creating custom beer tap handles has far-reaching benefits. It's an avenue for self-expression, a way to enjoy quality time if you're involving friends or family, and also an economically savvy project that can save you money over store-bought options. Plus, each handle stands as a testament to your craftsmanship, elevating the overall aesthetics of your home bar. By incorporating personal touches, you’re also creating a unique atmosphere that reflects who you are.

Incorporating Personal Style in Woodwork

What makes your tap handle special? Personalization can include everything from carving your initials to incorporating elements of your favorite sports team’s colors. This attention to detail can engage your guests on a deeper level as they ask about the story behind the handle.

Wrap Up: Your Turn to Craft

So, are you ready to embark on your beer tap handle-making journey? Collect your materials, ignite your creativity, and let the lathe do its magic. With these instructions, you have the beginning steps laid out for an enjoyable woodworking project that promises to yield impressive results—both in product and in memories. It's more than just a functional piece; it’s part of your home’s narrative, shared among friends over a cold drink.

Home Now and Future

0 Comments

Write A Comment

*
*
Related Posts All Posts
12.09.2025

Decoding the Functionality of Tape Measure’s Red Squares for DIY Enthusiasts

Update Unraveling the Mystery of Tape Measure's Red Squares If you’ve ever grabbed a tape measure for a DIY project, you may have paused to wonder about the little details that make these tools so incredibly useful. One prominent feature you might have noticed is the red squares around certain measurements. Most commonly, this feature designates every 16 inches—a spacing method crucial for construction and remodeling projects. Understanding this can save you time and ensure accuracy, making your projects smoother and your results more professional. The Importance of the 16-Inch Marker In the realm of woodworking and home construction, knowing where to place studs is critical. Most residential framing utilizes a standard spacing of 16 inches on center. As noted in an article from the Home Depot, the red squares on tape measures highlight these points, helping users quickly identify where to place framing materials. This not only simplifies your workflow but greatly reduces errors that arise from manual measurements. Additionally, understanding the significance of this marking enables anyone—whether they’re seasoned contractors or enthusiastic DIYers—to approach projects with confidence. How to Effectively Utilize Your Tape Measure Once you locate your first stud, the red squares on the tape measure can guide you in marking additional stud locations with ease. Simply start at your first stud and mark each subsequent point at every red square—essentially mapping out where you'll need to drive nails or screws. To double-check your placements, employing a stud finder is a wise next step. This method of measuring not only saves you from making calculations on the spot, but it also facilitates efficient planning for wall décor, appliances, or shelving installations. Other Helpful Tape Measure Markings Beyond the red squares, many tape measures contain other distinctive markings designed to assist in specific tasks. For instance, many feature black diamonds spaced at every 19.2 inches, which can be particularly helpful when working with engineered joists. As highlighted in references from both The Craftsman Blog and The Art of Manliness, these markings provide guidelines for achieving optimal material placement without requiring complicated calculations, allowing for quick and effective layouts. Maximizing the Benefits of Your Tape Measure Understanding the various features on a tape measure can greatly enhance your measuring experience. Apart from the red squares, knowing how to leverage the hook at the end of your measure can significantly ease the process. This hook not only allows for an accurate start point but can also slide to accommodate inside and outside measurements. Other clever uses include using the hook's divot to anchor it to nails for solo measurements, or using the tape body as a makeshift straight edge for cutting. It’s these small tricks that can make all the difference in ensuring precision in your measurements. Empowering Yourself with Knowledge Part of the satisfaction of tackling home improvement projects comes from knowing effective methods and techniques. Familiarizing yourself with the essential features of your tape measure empowers your DIY journey. You may discover that investing some time into understanding your tools results in not only increased efficiency but also a greater sense of satisfaction in seeing your project come to fruition. By embracing the knowledge of your tape measure—and specifically, the function of the red squares—you can approach your projects with greater assurance and a refined skill set. So, the next time you pull out your tape measure, remember that it holds the secrets to making your tasks easier and your results more impressive.

12.09.2025

Essential Tips to Winterize Your Motorcycle and Prevent Damage

Update Winterizing Your Motorcycle: Essential Steps to Keep Your Ride SafeAs the cold weather approaches and riding season gives way to winter storage, many motorcycle enthusiasts face the daunting task of effectively winterizing their bikes. This isn’t merely about putting your motorcycle away; it’s about safeguarding your investment and ensuring that it’s ready to ride come spring. Understanding the fundamentals of winter maintenance can save you from unexpected repairs and enhance your bike's longevity.Why Winterization MattersMotorcycles left in cold storage without proper maintenance are susceptible to various risks, including corrosion, battery drain, and fluid degradation. According to various sources, including industry professionals, over 60% of expensive motorcycle repairs in spring stem from routine maintenance tasks neglected during winter. By taking proactive steps to winterize your motorcycle, you can mitigate these risks and ensure a seamless return to the open road when the sun shines again.Key Steps to Winterize Your MotorcycleBefore you tuck your bike away for the season, follow these essential winterization steps:1. Clean Your Motorcycle: Start with a thorough wash to remove dirt, grime, and any road salt that could lead to corrosion. Use a motorcycle-specific cleaner mixed with water and gentle microfiber towels to preserve the finish.2. Change the Oil and Fluids: Old engine oil can harbor contaminants that cause internal damage when left stagnant over winter. Change your oil and filter, and check all fluid levels, including brake fluid and coolant.3. Treat the Fuel System: Fill your gas tank with fresh fuel and add a fuel stabilizer. Run the motorcycle for a few minutes to circulate the stabilized fuel throughout the system, which helps prevent gumming and corrosion.4. Disconnect the Battery: Remove your motorcycle’s battery or connect it to a battery tender to maintain its charge. This simple action can extend the battery’s lifespan significantly.5. Inspect and Inflate Tires: Proper tire inflation is crucial to prevent flat spots. Inflate tires to the recommended pressure and, if possible, lift the motorcycle off the ground to reduce weight on the tires.6. Use a Quality Cover: If you’re storing your bike indoors, invest in a breathable cover to protect it from dust and debris. Make sure it is securely fitted to avoid moisture buildup that can lead to corrosion.Creating a Maintenance ScheduleConsider checking on your motorcycle every few weeks during winter storage. Inspecting the battery and ensuring the cover is secure can save you headache in the spring.Incorporating Advanced Winterization TechniquesFor avid riders looking to further protect their motorcycle, fogging the engine with a protective oil and considering the installation of an SAE lead for easier battery connections can provide an added layer of defense against winter’s harsh conditions.Final Thoughts: Prepare Now for a Smooth Ride LaterWith these winterization practices, motorcycle enthusiasts can rest assured that their bikes will be in prime condition when the riding season resumes. Proactive care and diligent maintenance today will lead to fewer headaches come spring. For more in-depth advice on winter motorcycle maintenance, exploring resources from trusted motorcycle maintenance shops can help ensure that your ride is always ready for the road.

12.06.2025

Essential Entryway Storage Ideas to Beautifully Manage Clutter

Update Transform Your Entryway with Practical Storage Solutions Every guest that steps through your door experiences your entryway first, making it essential to create a space that combines beauty with functionality. With the right entryway storage ideas, you can eliminate clutter while showcasing your unique design style. From shoe benches to standing coat racks, the perfect storage solution is just waiting to be discovered. The Importance of a Tidy Space Entryways are pivotal transition zones in our homes where we shed our outerwear before diving into the comforts of home. However, left unattended, these areas can become chaotic repositories for shoes, bags, and other everyday items. According to interior designer Emilie Fournet, "Entrances should set the tone for the rest of the house." A well-organized entryway not only enhances aesthetics but also promotes a sense of peace and order in more functional rooms. Smart Entryway Storage Ideas Utilizing smart storage solutions can transform how you experience your entryway. Here are a few ideas that are widely appreciated by designers and experts: Storage Shoe Bench: Perfect for putting on shoes while providing an inviting seating area. Packed with hidden storage, these benches can hold everything from shoes to winter accessories. Console Tables: A slim console table is ideal for placing keys or mail. Look for vintage pieces to add character and functionality. Standing Coat Racks: These stylish features not only keep your coats organized but also save space when a closet isn’t available. Baskets: Incorporating baskets enhances the decorative element of your space while allowing for a catch-all solution for miscellaneous items. Bureaus and Dressers: Repurposing furniture can add charm and serve as a functional storage unit for hats and scarves. Embracing Functionality with Style While functionality is key, the visual appeal of your entryway should not be neglected. Each piece not only needs to serve a purpose but should also add to the overall ambiance of your home. When choosing solutions, consider your personal style and the message you want to convey to guests. Budget-Friendly Options to Consider Renovating your entryway doesn’t require a significant financial commitment. Many solutions can be affordably sourced from thrift stores and online marketplaces. For example, a simple coat rack can easily be found for under $10! For a cohesive design, consider painting or refinishing found furniture to match your color palette. This personalized touch can make your entryway genuinely reflect your style without breaking the bank. Conclusion: Create Your Dream Entryway By adopting these entryway storage ideas, you'll create a more welcoming and organized entry point to your home. Not only will you be preparing a beautiful space for guests, but you'll also be making your daily comings and goings more streamlined and enjoyable. Explore options today to enhance your entryway’s functionality and charm.

Terms of Service

Privacy Policy

Core Modal Title

Sorry, no results found

You Might Find These Articles Interesting

T
Please Check Your Email
We Will Be Following Up Shortly
*
*
*